Exterior Painting Preparation: What Needs to Happen First
When two exterior painting estimates are far apart, look at the preparation. One may include repairs and removal of failing paint. The other may price a new finish over what’s already there.
Ask the contractor to walk the exterior with you and explain what each surface needs. The condition of the siding and trim should determine the work.
Find the Reason the Old Paint Failed
Look closely at peeling edges, open joints, soft trim and stains below gutters or windows. A fresh coating will not repair rotten wood or correct a leak behind the siding.
Have the source of moisture checked before covering the evidence. Write repair areas into the scope, along with how additional damage will be handled if it appears during preparation. This is particularly useful when a repaint follows roofing, gutter or fascia work.
Clean Without Damaging the House
The surface needs to be free of dirt and contamination that would interfere with adhesion. The cleaning method should suit the material and its condition. Aggressive washing can damage soft wood or drive water into openings.
After washing, allow the surface to dry. A sunny afternoon does not establish that shaded trim or wood behind a joint is ready for paint. Sherwin-Williams’ surface guidance explains preparation requirements for different materials.
Remove Loose Paint and Prepare Repairs
The edges of failing paint need attention before coating. Sound paint can often remain, while loose material and rough transitions require preparation. Newly repaired areas also need to be ready for the specified finish.
For a home built before 1978, establish the lead-paint precautions before anyone sands or scrapes. The EPA’s homeowner guidance explains why disturbing old paint may require a lead-safe approach. Do not start by making dust and ask about it afterward.
Specify Primer and Joint Treatment
Bare wood, stains, repaired areas and existing glossy coatings can require different primer decisions. A product advertised as paint and primer does not answer every surface-preparation question. The estimate should identify the coating system and the areas needing primer.
Joint treatment also needs to respect how the wall drains and dries. Caulk should not close intended drainage openings. Check the siding manufacturer’s instructions instead of treating every visible gap as a defect.
Protect the Property and Set the Work Sequence
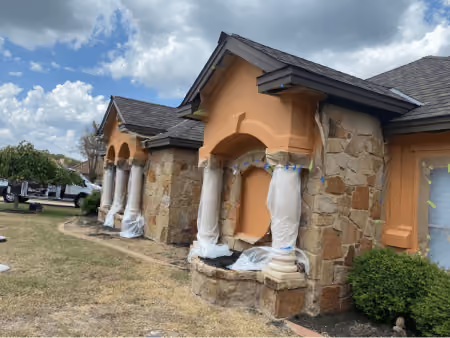
Agree on protection for glass, doors, lights, plants and walking areas. Confirm which fixtures will be removed or masked, how pets and vehicles will be kept clear, and when the painted surfaces can be used again.
The painting process should leave enough time for cleaning, repairs, primer and finish coats to dry as specified. Weather can change that schedule. A clear explanation of the delay is better than rushing a coat onto a surface that is still wet.
Ark handles house, stucco, trim and fascia painting. Bring the peeling areas and past repairs to the consultation. They help establish the work your home needs.
← All Gazette posts